First step: choose the If This service

Then you get a list of services IFTTT can have access to. Of course you’re gonna need to log into your account per service you hook-up to.
Let’s choose Instagram for this example, in order to create the famous Image Tweet.
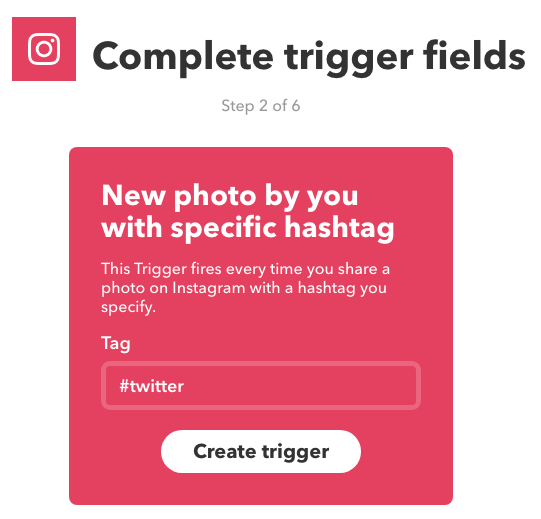
Second step: choose the If This action

Using the New photo by you with specific hashtag action will let you filter manually which ones to put on Twitter, in case not all of them should be reposted there.
Third step: choose the Then That service

Clicking on the blue plus sign this time will show a list of services again, but this time your choice will open up reaction options.
So let’s choose Twitter.
Fourth step: choose the Then That action
As we said earlier, the fourth step is about choosing the service that should react to your action. We will choose the Post a tweet with image action so that it will ask for an image source in order to post an image.
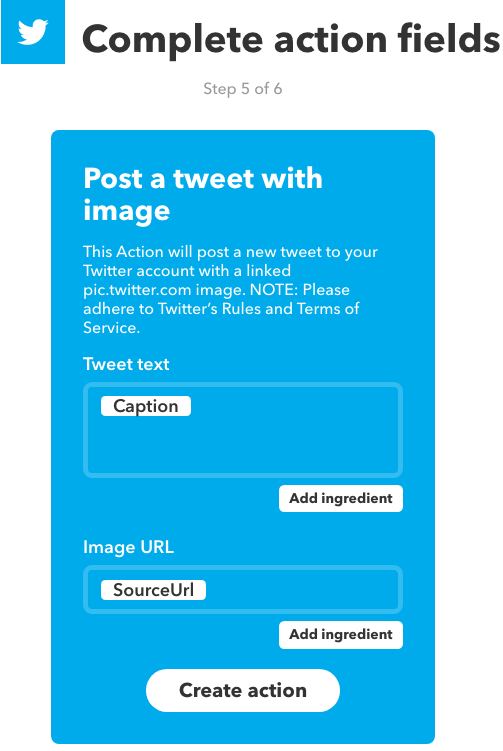
Fifth step: complete the action fields
Just like earlier when we chose the hashtag, this time we have two fields into which we need to insert values. Since IFTTT is all about saving time, these fields are already filled out for us, but we can change them if needed.

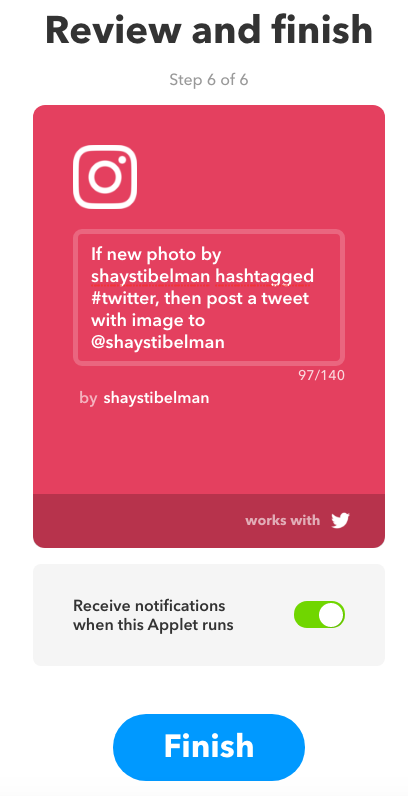
Last step: review and finish
Just make sure that everything is correct, change the description if you want, choose whether or not you would like to receive a notification every time the applet launches, and go!

My favorite applets:
- Getting push notifications from certain blogs mentioning certain keywords.
- Adding potential leads to a Google Sheet.
- Cross posting several elements from certain platforms to other platforms.
- Receiving emails from thought leaders and influencers and arranging them in folders according to a subject or keyword.
The limits of this tool are confined by your imagination, so get automatin’!
Don’t forget to tell us what your favorite applets are in the comments section!


One thought on “How to save time with automation”
Comments are closed.